Translate

Friday, July 25, 2014

Task #2 Mary F ~ Crazy Quilt Class with Kathy Shaw

Here is my Task # 2 assignment for the Crazy Quilt Class with Kathy.  Over the next year I will be creating more blocks with this same pattern while each block will have a different color palette.  For each block I plan on using the same color embellishments.  What I will be looking for are the effects of those same color embellishments against a different color, type and fabric background.  Along with comparison of color, I will also be considering an assortment of different Hoop styles I will be using.   Once each block is in the hoop, it will remain there until its completion. 

These are two of the blocks I have finished so far.  Each is created with the flip and sew method on white muslin fabric.  One of the blocks will be made up of all tan colors in neutral fabrics, and the other one is made up of all white color neutral fabrics.  Each block will have one type of texture fabric, ie. lace or linen, while the rest of the fabrics have a smooth texture.  The colors in all the blocks will range from an assortment of plain, tone on tones, and color.

TASK #2 Tan neutrals block with an eyelet lace texture
TASK #2 White neutrals block with a polyester lace texture

Tuesday, July 22, 2014

Task #1 Crazy Quilt Class with Kathy!

Crazy Quilt Class with Kathy ~

I am so excited !   As I finished up all the stitchery for the wedding, I was just in time to read a blog-post from Kathy that she was hosting a crazy quilt class on-line!  With registration ending soon (a few days) I had work to do ~ as Kathy was going to accept me into the class! YIPEEEE!

So I set about getting my internet registration stuff done, my blog name up on the class site, and then began gathering my crazy quilt supplies to see what I may have and see what I still would need to order.   By Sunday night I began my class notebook having printed off my instructions.  Next was to wrap my square hoop with twill tape, and put together my pvc square frame.

I have now completed Task # 1, sent in a photo of my supplies, received my next assignment over the internet, and tomorrow will set about creating my foundation block.  


Task #1 My supplies
Here is a link to read more about the class ~
http://www.shawkl.com/2014/07/crazy-quilt-embellishment-classes-are.html

Godspeed ~  Mary

Sewing for the Wedding

Woohoo ~ our daughter was married this weekend and although we are a bit tired ourselves from all the celebrating, we are overjoyed!   They are off on their honeymoon while the parents are having a low key week of relaxation and grandchildren fun in the warm New England sun.

These last two months all my available (and awake) time at home has been spent in my sewing studio making many preparations for the special day.  Although the bride was overjoyed with "the dress" she had purchased, it was in need of some serious alterations over the next 8 weeks :)  Our daughter was so confident her mom could accomplish all of this in her spare time.  I do believe she has more confidence in my abilities than I do at times.

The lovely beaded bodice part of the dress was two sizes too large, the length was one foot too long, and to her dismay it was strapless.   All things a momma could fix, Right?  I set about creating sketches for re-creating the dress and planning a strategy along with a timeline that I thought would accomplish the task at hand. 

As we were in need of perfect matching fabric,  that 12" hem I was to cut off would provide plenty of fabric, which, although it was on the bias, would be just wide enough on the straight of grain to create not only straps for this strapless dress, but also 2 pairs of shoes for the flower girls, 2 ring bearer pillows for the boys, and still have pieces left over for a garter, and a few scraps to go into a crazy quilt block.

 These little shoes were perfect for the occasion and not only were they pretty, they stayed on the little ones feet for the entire day!  The ring bearers pillow is my own creation, no pattern.  The pleats in both elements are a design element in the dress; one I used to create the straps on the dress and later used also on the shoes and the pillows.  

Godspeed ~


Beautiful Bride
Flower girl shoes made from wedding dress fabric
Ring bearer pillows made from wedding dress fabric and lavender I picked from the garden

Here is the link for the pattern for the shoes....
stardustshoes.blogspot.com
 

Baby Grandchildren keeping me busy

Crochet summer sandals
Sewing reversible dresses
What joy it is being Mimi to our 4 grandchildren.Our grandsons are ages 3 and 2 and our granddaughters,
both born last year, are ages 1 and 7 months.  

It is so much fun using the skills I have learned in creating
clothing and toys and more for each of them.

Here are a few photos of some recent pieces of work I have made.

Although I love quilting, for now it has been taking a back seat to these other craft skills. 

Terrycloth Robe
Minion mittens and slippers
 
Smocking Bonnets
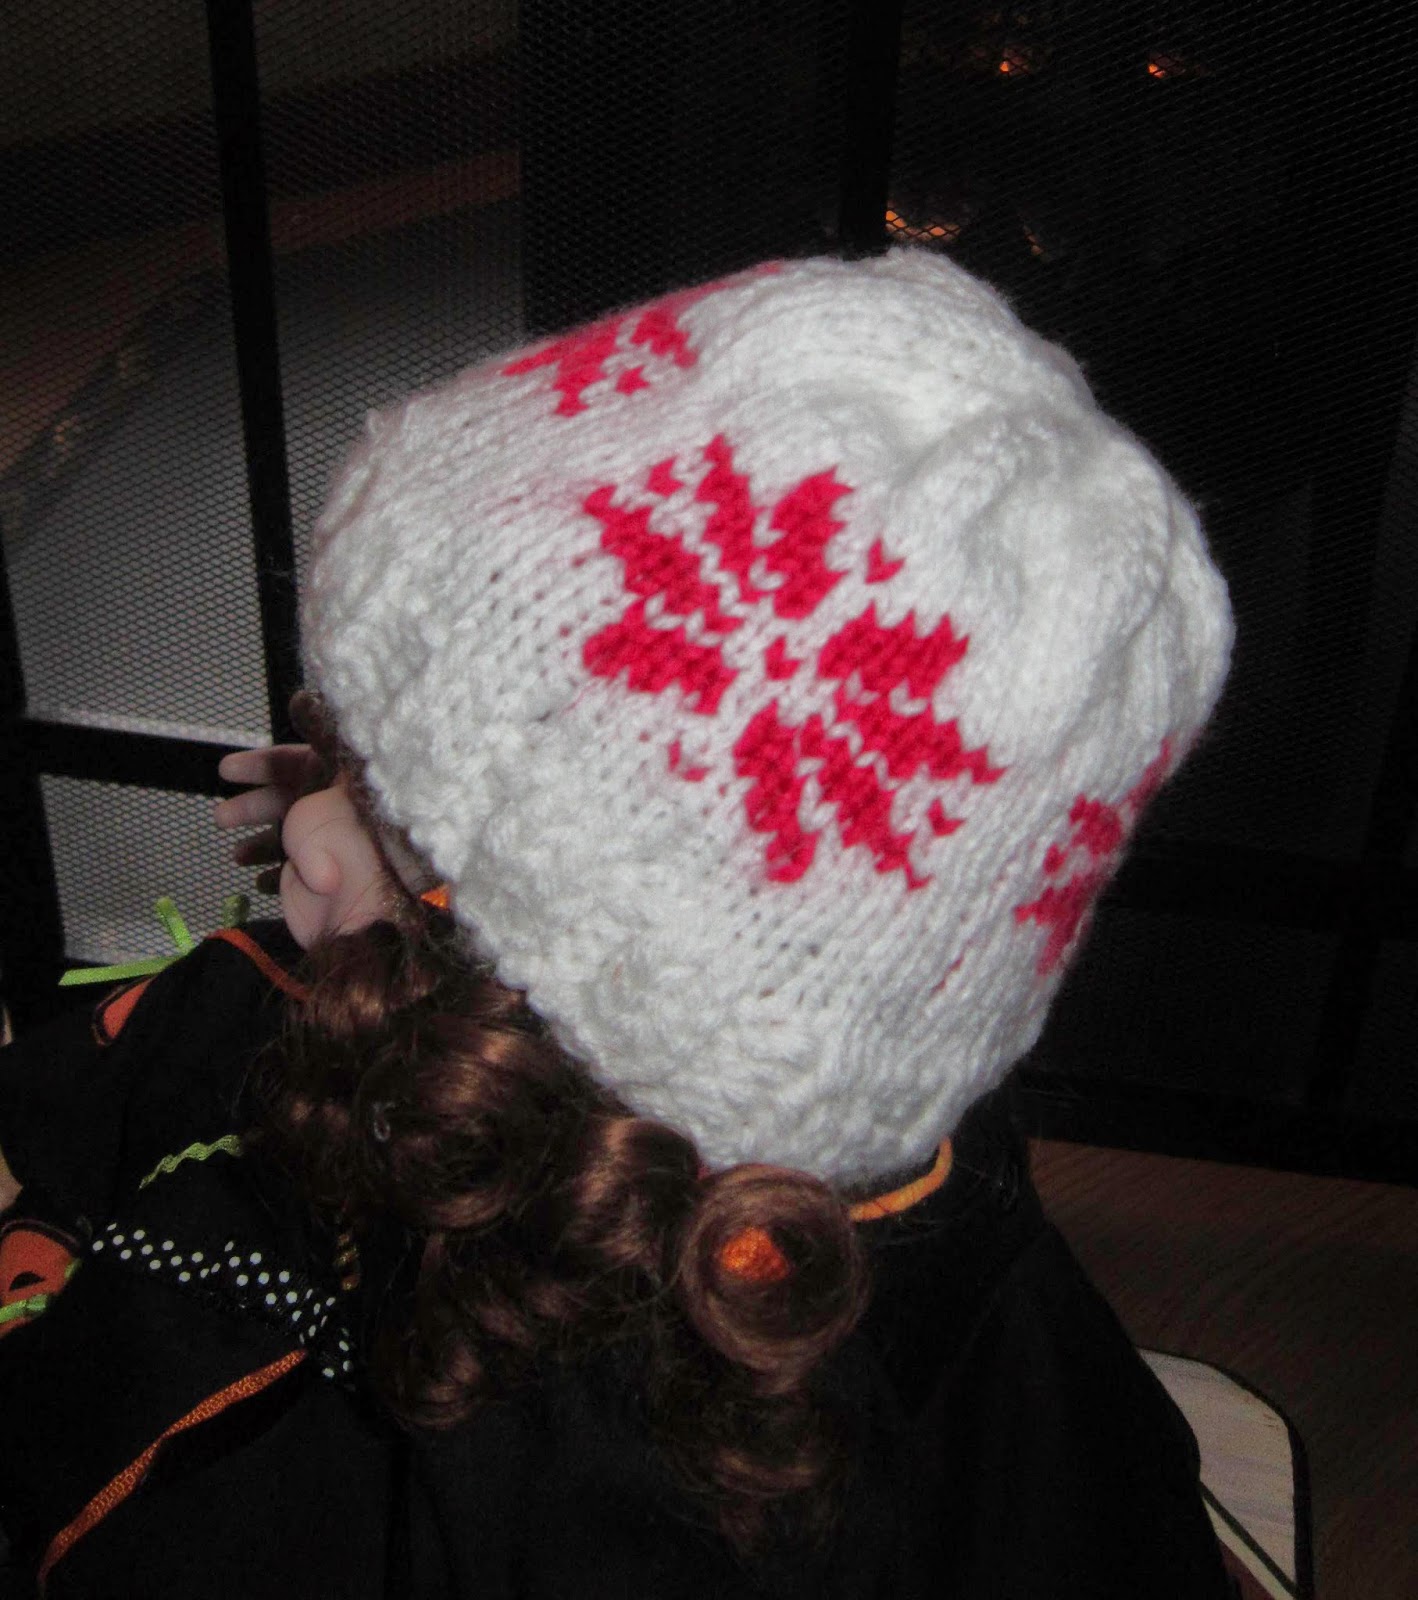
Knitting hats


]


Saturday, July 6, 2013

Vermont Quilt Show ~ Class with Cindy Needham

July 2013
 
Just back from my vacation in Vermont so we could attend  the Vermont Quilt Show!   Whoot ~ Whoot !   My man made all sorts of arrangements so I could attend a class with teacher Cindy Needham; what a wonderful gift.   It was so nice to finally meet the Linen Lady in person! 
I met Cindy at the bar on Saturday morning, the thread bar that is, and she is as nice as you can imagine.  There were about 20 students and she made sure to greet everyone and spent time with each student in small groups, large groups and individually when able!  Cindy has such a generous Spirit and is a phenomenal teacher; she wants you to know what she knows!  I have been learning from Cindy through her book, e-books and classes on line, and I am so glad I was finally able to be a student, in person.
 
Following are some photos of my projects from the Open Threadbar class.   If you have opportunity to attend one of her classes, take it.  Cindy even allowed me to take photos of her work, which gave me inspiration as to how to quilt a linen I bought that was torn. 
 
 Now I am off to see if I can pool together enough money to go to her Linen class, as she will be in New England again this summer, end of July, at the Maine Quilt Festival in Augusta Maine and price out a hotel vacancy in Augusta, Maine.  Then I'll be off to visit with the soon to arrive grandchildren. 
 
Thank you Cindy for traveling so far to share your gifts and talents with us in New England.  Till we meet again.
Godspeed,
Mary
PS…
The Vermont Quilt Show was great, lots of good teachers, venders and the quilts were so beautiful.  Bittersweet Fabric Shop in NH brought brand new Janome sewing machines for all of us in Cindy's classroom to use for the day!  Thank you Mr. LaValley.
 
 My Practice Sampler which later became a mug rug
What to do with a blank quilt sandwhich

 Divide the sandwich into 6 little postcard sizes trying some highlights and metallic threads.

 This was a simple FMQ pattern I used, and not once did any of the metallic threads break!  Good instruction, nice thread and brand new machines made a HUGE difference

 This is the first of the 6 areas I FMQ using a huge range of different threads.  Tried the metallic, highlights, rayons, silks, anything fun and colorful.  Only wish I could have tried some of the bobbin quilting with some of the Ricky Tims Razzle Dazzle, but we didn't want to monkey around with these brand new machines that were to be sold for a great price after the festival was over.  Will have to get a spool of razzle dazzle next thread order.

 I did some FMQ of straight lines using a highlight thread from Superior Threads to quilt the edges around two of the quilting areas.

 I couldn't throw away this practice sample, it had too many beautiful threads in it, and will enjoy the memory it will bring of our Open Threadbar class each time I use it, for I turned this piece into a mug rug.  The other sections I quilted will probably become  a couple post cards  and another mug rug :)


Next Project in class
We took a blank piece of fabric for backing, a batt, and then
I chose an orange tie dye piece for my quilt top

 
In the ripples of color on the fabric I imagined these Large flowers which I FMQ, and then filled the background with all sorts of leaves using rayon threads in FMQ

 
I bound the little mini wall hanging and it finished out at almost 12 inches.

 
This is the back of the wall hanging.  Even though I used contrasting threads on the front, the back shows the multitude of stitches so much better.
 
When all was said and done, I received my PhD in Threadology!   Thank you Cindy,
you are a wonderful teacher with such a kind and generous spirit!
 
Home now, just in time to harvest some of the lavender from the garden. 
 
Godspeed,   Mary

Sunday, January 13, 2013

FMQ Bonus Challenge is Bound

I have finished my FMQ KK Bonus quilt and I have had so much fun making this quilt as I tested out so many of the new techniques I learned on the internet.  Thank you Teri Lucas and Jeanne Sumaltro for the KK tutorials on how to turn my photos into a kaleidoscope in the shape of a pinwheel.  Thanks Ricky Tims for the Grand Finale DVD access, I tried some of your trapunto techniques on the pinwheel and feathers around it.  This was a playtime learning quilt.  Thanks SewCalGal for the FMQChallenge!

In this first photo I had FMQ the feather border in Rayon green thread using techniques I learned from Patsy Thompson in our FMQ December tutorial.  Love how symmetrical it looks and the only mark I had to create was the spine of half of one border, and that one pattern was later was used to complete the feathers on the whole quilt border.  I used a soap sliver for marking just the spine which meant NO MARKS TO FUSS WITH REMOVING.   LOVE THIS PART.

In this photo I was trying to decide which thread would look best for high contrasting hyper feathers!  Cindy Needham had showed me this trick about just unwinding thread right on your project!  The thread colors are always lighter off the spool so choose a color one or two shades darker than you might think you want.


This photo shows half the quilt in green feathers, while half is hyperquilted !   What a difference.  To cut down on the thread build up in the spine, I first did the hyper quilted plume, and then filled with the swirl inside before hyperquilting the next plume.   Love the look and not too much threadplay on the spine.


In this photo you can see the entire border is hyperquilted...  next step is the threadpainting and scribbling in each pinwheel.


I made two of the pinwheel blades go outside the first border using a green fabric similar to what was in the photo.  I then shadowed the grass behind each person on each blade making the people in the trapunto area pop right up!  I then did some threadpainting I learned from Nancy Prince on TQS and then followed up with some dense scribbling.  In the very center I attached a button and bead connecting all the spokes of the pinwheel together.


In this photo you see a closeup of the feather border, but also note the couching in the binding.  This was a technique I learned from Libby Lehman in a special DVD she had on the TQS show this fall.  I loved trying this out.  You attach the binding from the front, then fold and press in place and then she had some great techniques for working with the couching, and as you zigzagged over it to hold the couched thread in place, it also stitched the back of your binding AT THE SAME TIME.  No handstitching!  I also chose to use a black thread to couch with, as I like how it gave the thread some texture, and it also toned down this orange color!  I used a great technique I learned from Leah Day on how to attach the ends of your binding.  It works great and closes the ends on the diagonal, no bulk in the seam.

You can read more about this quilt at  http://cantstopstitchin.blogspot.com/2013/01/fmqc-bonus-tutorial-kk-dvd-teri-lucas.html

Godspeed,
mary

Thursday, January 10, 2013

FMQC Bonus Tutorial, KK DVD, Teri Lucas

FMQC Bonus Tutorial in December using the KK program!

Great tutorial for the December Bonus class with Teri Lucas.  It was exactly what I needed to finally open my KK3 DVD I ordered last year, and not onlydid I finally register the DVD, but I actually upload a family photo and made a Kaleidoscope to put feathers on for this challenge.


Here you see my pinwheel created from a photo of  me, AKA ~ Mimi and Grampa ~ with our two grandsons, ages one and two, taken at the end of summer.  Oh, what a blast being a grandparent to our wee ones is for us!  Love you boys.

Once our photo was uploaded and cropped to fit the pinwheel pattern (chose a pinwheel shape because our grandsons LOVE playing with pinwheels at Mimi and Grampa's house), I printed it on washed 100 percent white cotton pressed to freezer paper with a hot dry iron, and put it through our laser printer.  I would have used the inkjet printer, however, I purchased bubble jet rinse by mistake, should have gotten Bubble Jet wash solution.   Anyway, used the laser, then ironed with HOT dry iron, removed paper, and I was ready to begin.
Once I had my pinwheel shape and size printed out, and my borders attached to the printed piece, I drew out the pinwheel and then drafted some stitches I might like to use, along with some ideas on what to quilt 1st, 2nd, etc.

I stitched on the borders after having used my colorwheel to help choose fabric colors that would go well with those colors in our photo, the trick is using the correct value of color.  Then I stitched using variagated rayon thread the extra batt for trapunto around the pinwheel area and the first row of feathers.  Once completed, I cut away the remaining batt, like a cookie cutter cuts away the extra dough.  Then layered my quilt top, batt and backing,  and stitched in the ditch to secure the quilt.

Next, I added a second row of feathers and filler inside the first row of feathers, with dark purple rayon thread.  I even stitched the pie shaped pinwheels again, which are now pretty puffy with the trapunto work, and raised nicely off of the quilt top.  I then did two rows of echo quilting around the feathers on the pinwheel, before beginning the stippling.  I may add another row of stitching around each family member in each of the pie shapes on the pinwheel ~ haven't yet decided on that for sure.  Here you can see the back of the quilt


I chose the final black border, as this quilt will hang on our family photo wall, in which all the photos are in black frames.   Once I am sure all the stitching is done, I will put a protective finish over the photo printed part of the quilt.

To protect the photo ink from running and fading, I first tried a few different products I had on hand at our home.  Two were iron-on  laminates, both were high gloss.  The pellon iron-on did not hold up to hand washing, while the Heat n Bond surface held up to washing, it would leave the quilt with too shiny a surface.   The other two products were paint on items.  One was a clear varnish, which made the fabric stiff when dry; it did not hold up to hand washing, and the ink faded along with the varnish as it dried.  The final product I tried, Americana Fabric Medium, not only gave the fabric a nice drape when dry, but it held up to the washing, and it appeared to dry without fading or washing away the ink.  That will be what I will apply to my quilt top prior to hanging on display.

Lots of fun doing this bonus challenge, and nowthat I have done one, I have so many ideas for future KK projects. Cindy Needhams E-book updates she mailed out today, had some great tips for completing the quilting while the tutorial by Teri Lucas had great tips and inspiration for finaling opening and using the KK3 DVD I bought a while back.

Thank you again Sew Cal Gal ~ it sure has been a lot of fun participating in the FMQ Challenge.
* To see how this quilt finished, go to
http://cantstopstitchin.blogspot.com/2013/01/fmq-bonus-challenge-is-bound.html

Godspeed,
mary